Graduation photos tend to go one of two ways: everyone stands stiffly in a line with uncertain expressions, or the session produces something genuinely memorable. The difference is almost never about the location or lighting. It’s about preparation and direction.
Stiff poses happen when graduates feel self-conscious about where to put their hands, how to hold the diploma, or whether to look at the camera. Natural-looking graduation photography comes from specific direction and knowing which poses to use when.
This guide covers the poses that work best across the different parts of a graduation session: solo shots in cap and gown, family groups, friend groups, and the candid in-between moments that often become the favorites.
Graduation Pose Overview
| Category | What it captures | Best for |
|---|---|---|
| Solo cap and gown | The graduate as the subject | Announcements, formal portraits |
| Family poses | Graduate with parents and siblings | Milestone documentation |
| Friend and group poses | Classmates celebrating together | Shared memories, relaxed energy |
| Candid moments | Natural reactions between shots | Emotion and authenticity |
1. Solo Graduation Poses
Solo shots are the core of any graduation session. The goal is to have several strong options: at least one clean formal portrait, one dynamic shot with movement, and one relaxed candid-style image.
Front-facing portrait
The most requested graduation photo: the graduate facing the camera directly, diploma in one hand, the other hand at their side or lightly holding the diploma edge. Keep posture upright but not rigid. Ask them to shift their weight slightly onto one foot, which naturally relaxes the shoulders and removes the “standing at attention” stiffness.
The walk shot
Ask the graduate to walk slowly toward the camera (or away from it), looking straight ahead or slightly off to the side. Shoot in burst mode and review the frames. The natural arm swing and mid-stride moments almost always look more alive than a static pose. This works especially well on campus paths or steps.
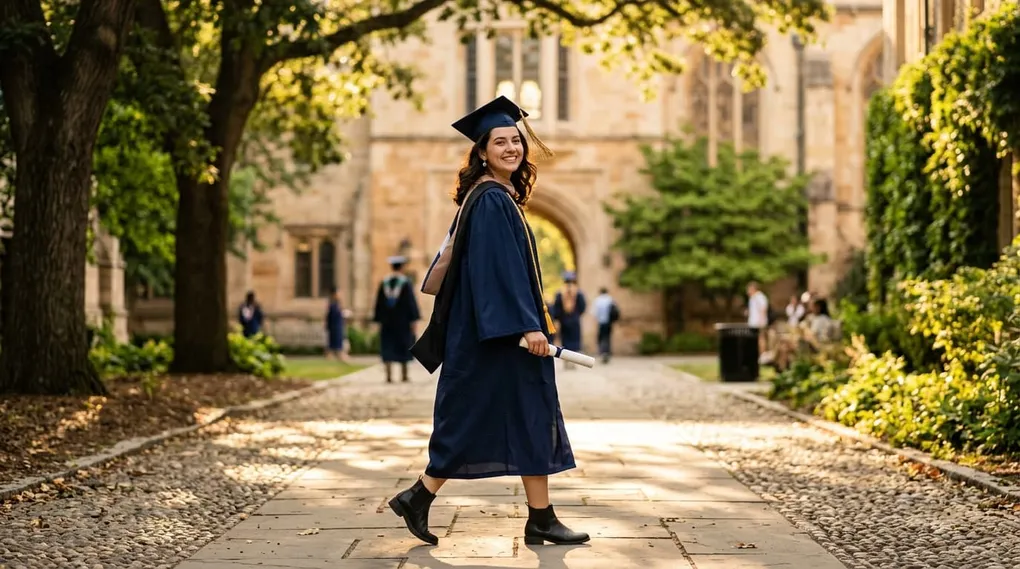
Over-the-shoulder look
Position the graduate walking away from the camera, then ask them to look back over one shoulder. This creates a sense of movement and gives the cap and gown a nice rear view. Works best on a path, staircase, or in front of a recognizable campus backdrop.
Diploma variations
A close-up of the graduate holding their diploma is a practical shot many families specifically request. Vary it: diploma open, diploma rolled, held at arm’s length, held to the chest. One version typically becomes the portrait used for announcements.
Cap toss
Popular, but with caveats. The cap toss requires burst mode, good timing, and a location without low branches or obstacles above. Brief the graduate on the sequence: toss up, watch the cap, let the natural expression happen. Review the burst and pick the frame with the best cap height and expression. Three or four attempts usually produces a usable shot.
Seated pose
A graduate seated on steps, a bench, or a low wall creates a relaxed, editorial feel. Have them lean slightly forward with elbows on knees, or sit sideways and look toward the camera. This pose works well as a break between standing shots and tends to produce natural expressions because the graduate is physically more comfortable.
2. Family Graduation Poses
Family shots require managing more people and more energy. The key is to move from formal to candid, not the other way around.
Classic group portrait
Start here: graduate centered, parents on either side, siblings filling in. Capture several clean versions with everyone looking at the camera. Get it done efficiently so you can move on to more natural variations. Once the family knows they have the formal shot, they relax.
Parent and graduate shots
After the group portrait, take pairings: graduate with both parents together, then with each parent individually if time allows. These carry more emotional weight than the full group. A simple side-by-side shot and one where a parent hugs the graduate are both worth capturing.
Prompted candid
After the formal shots, say something like: “Everyone congratulate them at once.” The resulting hug pile or burst of genuine emotion is almost always the strongest family photo of the session. The family is warmed up, relaxed, and reacting naturally rather than performing.
Sibling shots
If siblings are present, a one-on-one shot with just them creates a natural contrast to the parent photos and is often the image the graduate ends up keeping on their phone.
3. Friend and Group Graduation Poses
Group shots with friends are typically more relaxed than family shots, but they can turn chaotic quickly with large groups.
Walking together
Line up the group side by side and have them walk toward the camera. This works well for groups of two to five. The natural movement and group dynamic produces variety even across a single burst. For larger groups, stationary poses are easier to manage.
Candid group shot
Give the group a loose direction: “Put your arms around each other and just talk for a second.” Shoot while they’re chatting, not during a silent pose hold. Laughing groups, mid-conversation expressions, and natural lean-ins make these shots look nothing like a stiff class photo.
Cap and gown group portrait
One clean formal-style shot of the group in their regalia is worth capturing for the documentation value. Arrange by height for visual balance, make sure every face is visible, and take several frames for blinking insurance. Keep it quick.
Two-shot with a close friend
A pair shot in cap and gown is often the most personally meaningful graduation photo for the graduate. Keep it simple: side by side, arms around each other, natural expressions. One variation looking at each other instead of the camera usually stands out.
4. Candid and In-Between Shots
The frames taken between posed shots consistently rank among the favorites when clients review their galleries.
Shoot during transitions: when the graduate is checking their phone between setups, adjusting the cap, talking to a parent, or walking between locations. These frames have natural expressions that posed shots rarely match.
Direction helps here too. Instead of “smile at the camera,” try: “Tell your mom what you’re thinking right now.” The resulting moment produces a real expression rather than a camera expression.
Other prompts that work well:
- “Walk over to that spot and take in the view for a second” (creates movement and removes camera awareness)
- “Pretend you just opened your acceptance letter” (activates a specific memory and expression)
- “Lean against the wall and just breathe for a moment” (removes the performance pressure entirely)
Directing Graduates Who Feel Awkward on Camera
Most graduates are not experienced subjects. A few habits consistently help.
Brief them before the session. Send a short note outlining the types of shots planned and what to expect. Knowing the structure removes uncertainty, which is a major source of stiffness.
Start with action, not stillness. Begin with a walking shot rather than a static pose. Movement gives people something to do, which is easier than being told to “just stand there and smile.”
Give specific physical direction. “Relax your shoulders” is vague. “Drop your shoulders down an inch and tilt your chin slightly toward me” is specific and actionable. Physical cues are easier to execute than emotional ones.
Review a few images together early. Showing a strong frame early in the session builds confidence. Graduates who can see what the photos actually look like stop imagining the worst and start relaxing into the session.
Keep energy consistent. Graduates take cues from the photographer. A calm, positive presence during the session prevents the energy from dropping when a pose isn’t working on the first attempt.
After the Session: Sharing Graduation Photos
Once editing is done, delivery matters as much as the photos themselves. Graduation photos are shared widely: with grandparents, extended family, and friends who couldn’t attend the ceremony. Families expect quick, easy access.
A dedicated client gallery keeps the experience clean. Graduates and family members can browse and download at full resolution without needing accounts or dealing with compressed files from generic cloud storage. A private, password-protected gallery the photographer controls lets the family access the photos immediately on any device.
It’s also worth considering how the photos will be used downstream. Many families order prints, create photo books, or want specific images for announcement cards. An organized gallery with clean high-resolution downloads makes that process straightforward instead of a back-and-forth email thread.