Macro photography reveals a world just below the threshold of normal vision. A flower’s stamen becomes a landscape of texture. A water droplet becomes a perfect lens reflecting the scene behind it. An insect’s compound eye becomes a mosaic of geometry. The subject does not change; only the scale does.
Getting to that scale requires the right equipment and a different set of habits from regular photography. At macro distances, depth of field shrinks to millimeters, small camera movements become large blurs, and light becomes difficult to control without blocking it. This guide covers the macro photography tips, settings, and techniques that produce sharp, detailed results.
What Is Macro Photography
Macro photography produces images at a reproduction ratio of at least 1:1. At 1:1, a subject 20mm wide fills 20mm of the sensor: life-size. Many lenses marketed as “macro” only reach 1:2 or 1:4 magnification, which is close-up photography. Useful and worth doing, but not technically macro.
The distinction matters when buying equipment. Not every lens labeled “macro” reaches 1:1, so check the specifications before purchasing.
Equipment Options
Three main approaches produce macro magnification:
| Option | Magnification | Image Quality | Cost | Best For |
|---|---|---|---|---|
| Dedicated macro lens | 1:1 or greater | Excellent | High | Regular macro work |
| Extension tubes | Depends on tube length + lens | Very good | Low | Budget-conscious photographers |
| Close-up diopter filters | Variable | Good (varies by quality) | Low | Casual or occasional use |
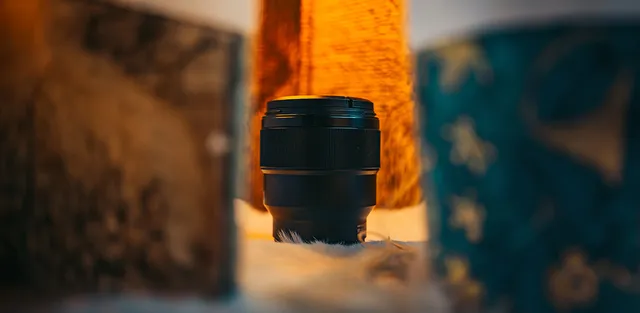
Dedicated Macro Lenses
A dedicated macro lens is built specifically for close-focus work. Most produce 1:1 magnification at minimum focus distance and are optically corrected for flat-field rendering, meaning subjects stay sharp across the frame rather than softening at the edges. Common focal lengths are 50mm, 90-105mm, and 150-180mm.
Focal length affects working distance. A 50mm macro lens focuses at roughly 20cm from the subject; a 100mm lens at roughly 30cm; a 150mm at roughly 40cm. That extra distance matters with insects: a 50mm lens gets close enough to startle the subject, while a 150mm gives you room to work without disturbing it.
Most macro lenses also work well as portrait or general-purpose lenses, making them among the more versatile purchases in photography.
Extension Tubes
Extension tubes are hollow rings that fit between your camera body and an existing lens. They push the lens further from the sensor, reducing minimum focus distance and increasing magnification. A set of three tubes at different lengths lets you stack them for varying amounts of magnification.
The main tradeoff: extension tubes reduce the light reaching the sensor. A 25mm tube on a 50mm lens costs roughly one stop of light. You compensate by raising ISO, using a slower shutter speed, or adding a light source.
Modern extension tubes with electronic contacts preserve autofocus and aperture control. Older fully manual tubes work fine for stationary subjects where you are manually focusing anyway.
Close-Up Diopter Filters
Close-up filters screw onto the front of your lens like a UV filter and act as magnifying lenses. They are rated in diopters (+1, +2, +4, +10); higher numbers produce greater magnification.
Quality varies significantly. Cheap single-element diopters introduce chromatic aberration and edge softness. High-quality double-element filters (the Raynox DCR-250 is a well-regarded example) produce much better results. Close-up filters do not reduce light transmission, which is their main advantage over extension tubes when working in available light.
Camera Settings for Macro Photography
The macro photography settings that produce sharp results differ from standard shooting in a few key ways.
| Setting | Recommended Range | Why |
|---|---|---|
| Aperture | f/8 to f/16 | Maximizes depth of field |
| Shutter speed | 1/200 or faster (live subjects) | Freezes subject movement |
| ISO | As needed for correct exposure | Prioritize exposure and shutter speed |
| Focus mode | Manual | More precise at extreme close range |
| Metering | Spot or center-weighted | Avoids blown backgrounds |
Aperture is the most critical variable. At 1:1 magnification with a 100mm lens, depth of field at f/8 is roughly 1-2mm. At f/2.8, it is a fraction of a millimeter. Stopping down to f/11 or f/16 extends the in-focus zone at the cost of slight diffraction softening above f/16. For most subjects, f/8 to f/11 is the practical sweet spot.
Shutter speed depends on whether the subject moves. For stationary subjects on a tripod, any speed that produces correct exposure works. For insects and other living subjects, 1/250 or faster prevents motion blur from subject movement, even when the camera is locked down. Shoot in RAW rather than JPEG: macro scenes have high local contrast and RAW gives you the recovery latitude to pull back highlights on reflective surfaces without losing shadow detail. See our RAW vs JPEG guide for the full breakdown.
Core Techniques
Working with Depth of Field
Depth of field in macro is measured in millimeters. This is the most disorienting shift for photographers moving from regular to macro work. An aperture of f/11 that renders an entire landscape in focus will leave only a thin band of a flower sharp at close range.
Work with this rather than against it. Angle the camera so the most important plane of the subject runs parallel to the sensor. Photographing a flower face-on rather than from the side puts more of the petals in the same focal plane, making it easier to get the key details sharp in a single frame.
Focus Stacking
When a single frame cannot capture enough depth of field, focus stacking combines multiple exposures taken at slightly different focus distances into one image with greater apparent sharpness throughout.
The process: mount the camera on a tripod, take a series of exposures while advancing the focus point in small increments from front to back across the subject, then merge them in software. Photoshop, Lightroom, and dedicated applications like Zerene Stacker or Helicon Focus all handle the merging automatically.
A focus rail lets you move the camera in controlled increments rather than adjusting the focus ring between shots. Even without a rail, small focus ring adjustments produce usable stacks for most subjects.
Lighting
At macro distances, the lens often blocks available light by getting too close to the subject. Several approaches help:
- Ring flash or ring light: Attaches to the front of the lens and provides even illumination from directly in front. Minimizes harsh shadows. Common in medical and scientific macro work.
- Twin flash: Two small flash heads mounted on either side of the lens, with adjustable ratio between them for shaped light.
- Reflector card: A small piece of white foam board redirects available light onto the subject at no cost.
- Off-camera flash: A single small flash positioned to one side gives directional light that reveals texture. Use a sync cord, wireless trigger, or a darkened room with a slow enough shutter speed to allow the flash to do the work.
Overcast natural light works well because it produces soft, directionless illumination. Direct sunlight creates harsh shadows that are difficult to manage at macro distances.
Stability
Any camera movement at macro distances produces blurred images. The main tools for managing it:
- Tripod: The most reliable solution. A tripod that allows the camera to be positioned horizontally or close to the ground handles low-angle subjects.
- Remote shutter release or self-timer: A cable release or wireless remote eliminates shutter button vibration. If you do not have one, the camera’s 2-second self-timer works just as well for stationary subjects.
- Live view: On DSLRs, live view raises the mirror before the shutter fires, eliminating mirror shock. On mirrorless cameras there is no mirror, so this is a non-issue. Either way, live view enables focus peaking, which helps with precise manual focus at close range.
Best Subjects to Start With
Flowers are the most forgiving macro subject. They do not move, they are abundant, and they reward sharp technique with immediate visual results. Work through the camera settings and depth of field concepts on flowers before moving to more demanding subjects.
Coins and watch parts are ideal for indoor practice. You control all the variables: lighting, positioning, and stability. The precision of manufactured objects shows you exactly where focus lands and how depth of field falls off.
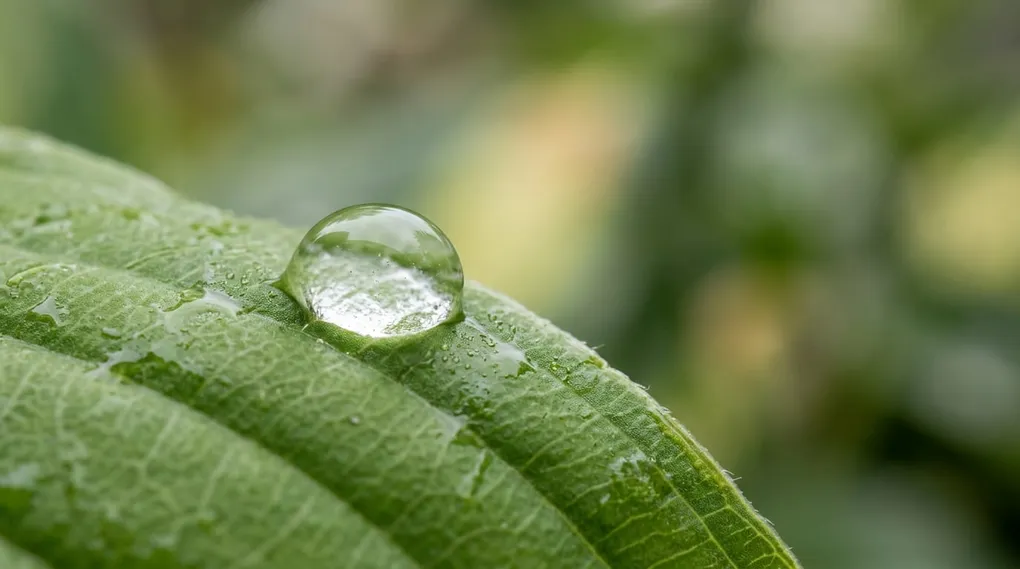
Water droplets produce striking results and are straightforward to set up. Place drops on a leaf, flower petal, or piece of fabric using a spray bottle. Each droplet acts as a tiny lens that reflects and refracts the surroundings.
Insects are the classic macro subject and the most challenging. Early morning, when temperatures are lower, keeps insects slower and more cooperative. Approach slowly, stop when they react, and move again only when they settle. A longer focal length macro lens (100mm or more) keeps you further from the subject, reducing disturbance.
The most common mistake in macro photography for beginners is chasing harder subjects before the fundamentals are solid. Start with flowers or coins, lock in your settings and focus technique, then move to insects and water droplets once the basics feel automatic.