The number in your file’s DPI field does nothing on its own. You can open a photo, change it from 72 to 300, save it, and the image is pixel for pixel identical. What actually determines whether a print looks sharp is how many pixels you have spread across how many inches of paper.
That distinction matters because it is the source of most print panic. A client’s designer asks for “300 DPI,” the photographer checks the file, sees 72, and assumes the shoot is ruined. It almost never is.
DPI vs PPI: They Are Not the Same Thing
DPI and PPI measure two different things, and the confusion between them causes most bad print decisions.
PPI (pixels per inch) describes your digital file: how many of its pixels land in each inch of the finished print. This is the one photographers control.
DPI (dots per inch) describes the printer: how many individual ink dots the machine sprays per inch of paper. Inkjet printers quote figures far higher than any image resolution, with Epson commonly listing up to 5760 x 1440 dpi and Canon models around 4800 x 1200 dpi. Those numbers describe ink placement, not your photo.
| PPI | DPI | |
|---|---|---|
| Describes | Your image file | The printer’s ink output |
| Controlled by | The photographer | The printer hardware |
| Typical value | 240 to 300 | 1200 to 5760 |
| Changes image quality? | Yes, via pixel dimensions | No |
In practice the industry uses the terms interchangeably. When a print lab asks for a 300 DPI file, it means 300 PPI at the final print size. Answer the request; do not correct their vocabulary.
Why the DPI Field in Your File Changes Nothing
The DPI value stored in a photo is metadata, a note attached to the pixels rather than a property of them. It tells software what size to print the image by default, and nothing more. Changing it without resampling neither adds nor removes a single pixel.
What actually governs print sharpness is simple division:
Pixel dimensions ÷ print size in inches = PPI
A 24-megapixel camera produces roughly 6000 x 4000 pixels. Divide by 300 and you get a 20 x 13.3 inch print at full 300 PPI quality. Divide the same file by 240 instead and it covers 25 x 16.7 inches. The file never changed; only the size you chose to print it at did.
This is why a “72 DPI” file straight out of an export can print beautifully. If it holds 6000 pixels on the long edge, it holds them regardless of what the metadata claims.
What DPI You Actually Need for Printing Photos
The best DPI for printing photos is 300 PPI at final print size, and it is what most professional labs specify. Below that, the honest answer is that the right DPI for printing scales with viewing distance rather than with print size.
- 300 PPI for prints held in the hand or viewed close: albums, 8x10s, portfolio pieces, anything a client will inspect at arm’s length.
- 240 PPI for framed prints on a wall. The difference from 300 is invisible at normal viewing distance, and this is a useful fallback when a crop has cost you pixels.
- 180 PPI for large wall art viewed from several feet back, such as a 30 x 40 inch canvas above a sofa.
- 150 PPI and below for banners, backdrops, and trade show graphics, where the viewer is never closer than several feet.
The reason 300 became the benchmark is human eyesight. The eye resolves detail down to roughly one arcminute, which at a typical 12 inch viewing distance works out to about 300 pixels per inch. Push past that and you are recording detail nobody can see.
Nobody presses their face against a 40 x 60 inch print. Match the resolution to how the piece will actually be looked at, not to a number you feel you should hit.
300 DPI vs 600 DPI: When the Bigger Number Helps
For photographs, 600 PPI is wasted effort. A continuous-tone image printed at 600 PPI is indistinguishable from the same image at 300 PPI at any normal viewing distance, the file is roughly four times larger, and most labs downsample it back to their native resolution before printing anyway.
600 PPI earns its place with hard-edged content: line art, logos, type, and scanned documents. Sharp black-on-white transitions genuinely benefit from the extra sampling, which is why archival and line-art scanning is commonly done at 600 dpi rather than 300, and why a brochure with fine type is prepared differently from a portrait.
If you are sending a photograph, 300 is the ceiling worth caring about. Spend the effort on the print size instead.
How to Change DPI Without Touching Your Pixels
Changing the DPI tag is a two-second job in either main editor, and the critical part is not resampling by accident.
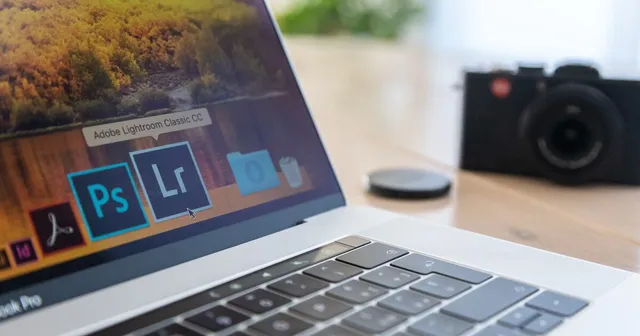
- Photoshop: open Image > Image Size and uncheck Resample before typing the new resolution. With resampling off, the pixel dimensions stay locked and only the implied print size shifts. Leave it checked and Photoshop will add or discard pixels.
- Lightroom: set the value in the Export panel’s Image Sizing section. Leaving “Resize to Fit” unchecked exports full pixel dimensions with your chosen resolution written into the metadata.
Resampling upward is a different operation entirely: it invents pixels by interpolation rather than recovering detail that was never captured. Modern AI upscaling has made this far more usable than it once was, but a native 300 PPI file still beats an upscaled one. Crop conservatively when you know a frame is destined for a large print.
What to Actually Send a Client
Send the full-resolution export and let the lab handle the rest. Pre-downsizing a file to hit a specific print size is a decision made on the client’s behalf with information you do not have, and it cannot be undone. If they later want a 24 x 36 inch print from a file you helpfully resized to 8 x 10, the pixels are gone.
For print work, export JPEG at maximum quality. The difference between RAW and JPEG matters enormously while you are editing and very little by the time the file reaches a lab, which wants a finished, flattened image rather than your negatives.
The rest of the delivery spec is short:
- Export at full pixel dimensions, in sRGB unless the lab explicitly asks for Adobe RGB.
- Set the resolution field to 300 so the metadata matches what the lab expects to see.
- Keep the file uncompressed after export. Never deliver through a channel that recompresses.
That last one is the most common way full-resolution files quietly stop being full resolution, and the guide on how to send high resolution photos covers the methods that preserve the original file.
A client gallery platform such as Picstack handles this by serving the original file on download, so what the client sends to their lab is exactly what you exported.
Get the pixel dimensions right at capture and crop, and the DPI question mostly answers itself. The metadata field is a label; the pixel count is the photograph.