Most disappointing flash photos come down to one choice: a small light fired straight forward from the camera position. Tilt that same flash at the ceiling, or move it a few feet to the side, and the light starts reading like it came from a window instead of from a machine.
Flash is not a “when it gets dark” tool. It is the only light source you control completely, which is why knowing how to use flash photography well pays off even if natural light is your first love.
The Idea That Makes Flash Click
Every flash photo is two exposures stacked in one frame:
- Ambient exposure (the room, the windows, the sky) is set by shutter speed, aperture, and ISO.
- Flash exposure (whatever the burst actually reaches) is set by flash power, aperture, ISO, and distance to the subject.
Shutter speed appears in the first list and not the second. A flash burst lasts between 1/1,000 and 1/20,000 of a second, far shorter than the shutter is open, so going from 1/60 to 1/200 darkens the background by a stop and a half while your subject barely changes.
Two controls, two jobs: shutter speed sets the background, flash power sets the subject. Once that split is intuitive, most flash problems get easy to diagnose.
When to Use Flash
| Situation | What flash is doing | Starting point |
|---|---|---|
| Dim indoor events | Replacing weak, ugly overhead light | 1/160, f/4, ISO 800, TTL, bounced |
| Harsh midday sun | Filling eye and chin shadows | 1/200, f/5.6, ISO 100, FEC -1.3 |
| Backlit portrait at sunset | Lifting the face while the sky keeps its color | 1/200, f/4, ISO 200, FEC -1 |
| Movement in low light | Freezing action with a short burst | 1/125, f/4, ISO 800, TTL |
Distance is what rules flash out. A stage from the back row, a landscape, a lit building: all hopeless. Light falls off with the square of distance, so doubling your distance costs two stops. A pop-up flash has a guide number around 12 (meters at ISO 100) against 40 to 60 for a hot-shoe unit, which is why it gives up after a few feet.
Flash Photography Settings That Work
Set the ambient exposure first, in manual, before you think about the flash. Shoot a frame with the flash off, decide how much of the room you want to see, then underexpose that reading by one to two stops: the room still reads as a room, but the flash gets to be the main light.
| Setting | Indoor event (bounced) | Daylight fill flash |
|---|---|---|
| Mode | Manual | Manual or aperture priority |
| Shutter | 1/125 to 1/160 | 1/200 (sync speed) |
| Aperture | f/2.8 to f/4 | f/5.6 to f/8 |
| ISO | 800 to 1600 | 100 to 200 |
| White balance | Flash | Daylight |
| Flash mode | TTL | TTL |
| Flash compensation | 0 to +1 | -1 to -1.7 |
Two rows surprise people. ISO stays high indoors even with a flash, because bouncing throws away one to two stops; leaving it at 100 forces full power on every frame, which drains batteries and stretches recycle time. And flash compensation runs positive for bounce, negative in daylight where you only want a whisper of it. That dial overrides TTL without touching ambient exposure, which is what you want when TTL overcooks pale skin or a white shirt.
TTL vs Manual Flash
TTL metering fires an invisible preflash, reads what bounces back, and picks a power level in the instant before the shutter opens. Canon calls it E-TTL II, Nikon i-TTL, Sony pre-flash TTL, and all of them react to whatever happens to be in front of you.
That reaction is a gift at a reception, where you are three feet from a toast and twenty feet from the dance floor a minute later. It is a liability in a fixed setup, where a dark suit and a white dress get different power levels. Manual flash holds a fraction of full output (1/1, 1/2, down to 1/128) until you change it, so identical frames get identical light. That consistency shows up when a client scrolls the whole set side by side in a client gallery: flash that jumps in brightness frame to frame reads as amateur work.
TTL for anything moving, manual for anything you set up. Either way, the bigger win is where you point the head.
Bounce Flash Is the Biggest Single Upgrade
Light quality depends on the apparent size of the source. A flash head is two inches wide, which is why direct flash gives hard-edged shadows, shiny foreheads, and that pasted-onto-the-background look. Point the same head at a ceiling and you are lighting with a source several feet across.
- Ceiling bounce is the fastest fix in any room with a white ceiling under about twelve feet. Tilt 60 to 75 degrees rather than straight up, so some light still reaches the eyes. In a tight room, aim backwards instead, into the corner where wall meets ceiling.
- Wall bounce adds direction, not just softness. Turn the head 45 degrees toward a wall and the light arrives from the side, which shapes a face far better than anything from the camera position.
Bounce surfaces have to be neutral. A beige ceiling casts warm light, a green wall casts sickly light, and mixed sources leave you fighting two color temperatures at once. Flash fires at roughly 5500K while household bulbs sit near 2700K, so white balance in photography matters more with bounce flash than anywhere else. The pro move: tape a CTO gel over the head to match the room, then set white balance to that warmer value.
Fill Flash in Bright Daylight
The counterintuitive use of flash is at noon. Overhead sun carves black shadows into eye sockets and under chins, and exposure compensation cannot fix shadow direction. A burst of fill flash at -1 to -1.7 lifts those shadows without announcing itself.
The same trick saves backlit portraits: expose for the sky so the sunset keeps its color, then let the flash bring the face up. Skip it and you choose between a silhouette and a blown-out background, which is why golden hour photography sessions so often include a speedlight.
One catch: shooting wide open in bright sun needs a shutter speed past your sync limit. That is what high speed sync is for (Auto FP on Nikon, HSS on Canon and Sony). It pulses the flash through the whole shutter travel at the cost of one to two stops, so you shoot closer or add power.
Getting the Flash Off the Camera
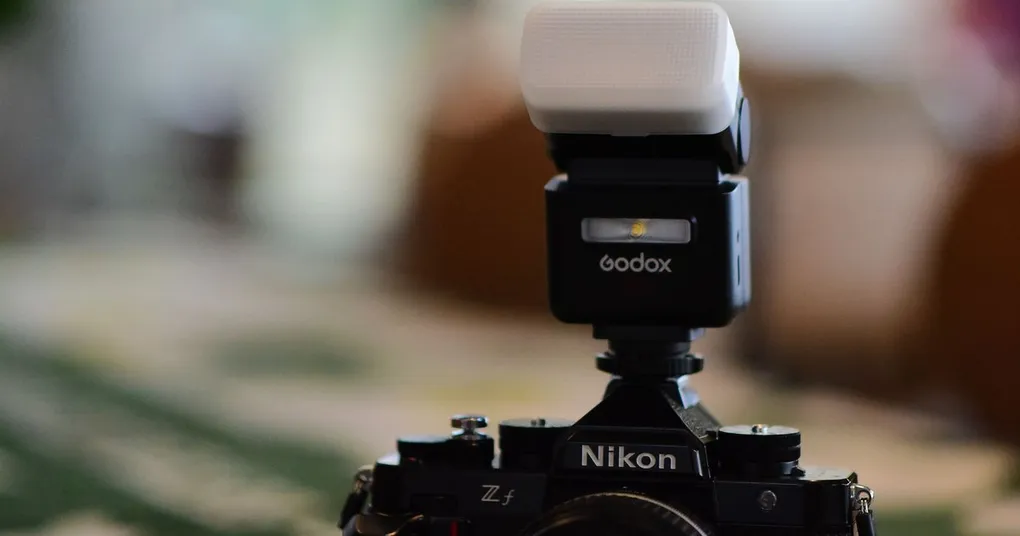
Even bounced, an on-camera flash is stuck at your shooting position. A radio trigger, a light stand, and a small softbox change the geometry completely. Most photographers start in the Godox ecosystem: a TT685 II speedlight around $150, the round-head V1 closer to $300, an X2T trigger around $50, all with TTL and high speed sync. First-party units like the Canon Speedlite EL-5 or Nikon SB-700 typically start around $300.
Put the light 45 degrees to one side and slightly above eye level, roughly where the sun sits mid-morning. Fire a test frame, then walk the light closer until the shadows soften: closer means bigger relative to the subject, and bigger means softer. One flash, one softbox, one position covers most portrait work.
Mistakes Worth Skipping
Leaving compensation where you left it. The -1.7 that saved your beach portraits will underexpose everything indoors that evening.
Forgetting about silent shutter. Many mirrorless cameras disable flash entirely in fully electronic shutter mode. Check that before blaming the hot shoe.
Ignoring rear-curtain sync. It fires the flash at the end of the exposure, so motion trails fall behind a moving subject instead of in front of it: excellent for dancing, terrible for a posed group.
Take one flash into one room and shoot the same portrait four ways: direct, bounced off the ceiling, bounced off a side wall, and off-camera at 45 degrees. Four frames, four genuinely different photographs, identical gear. That comparison teaches more about flash photography than any amount of reading, and it takes ten minutes.