

Framing in photography is a composition technique where you use elements within the scene to create a border around your subject, drawing the viewer’s eye inward and isolating the subject from the surrounding environment. Unlike leading lines, which guide the eye along a path, framing encloses the subject. The result is an image with more depth, stronger focus, and a clear visual hierarchy.
Most photographers walk past usable frames every single day. A doorway, a gap between branches, an archway in an old building: these are all frames waiting to be used. The technique works because it gives the viewer’s eye a boundary, a natural edge that says “look here, not there.”
There are five main types of framing, each with a distinct look and set of common sources. The following framing photography examples and techniques cover everything from tree canopies to shafts of light:
| Type | Common sources | Visual effect |
|---|---|---|
| Natural | Trees, branches, rock arches, caves | Organic, immersive, environmental |
| Architectural | Doorways, windows, arches, tunnels | Structured, geometric, dramatic |
| Frame within a frame | Mirrors, picture frames, screens | Layered, conceptual, self-referential |
| Foreground | Leaves, flowers, fences, out-of-focus objects | Depth, intimacy, context |
| Light and shadow | Shafts of light, shadow cutouts, spotlights | Mood, contrast, visual weight |
1. Natural Frames
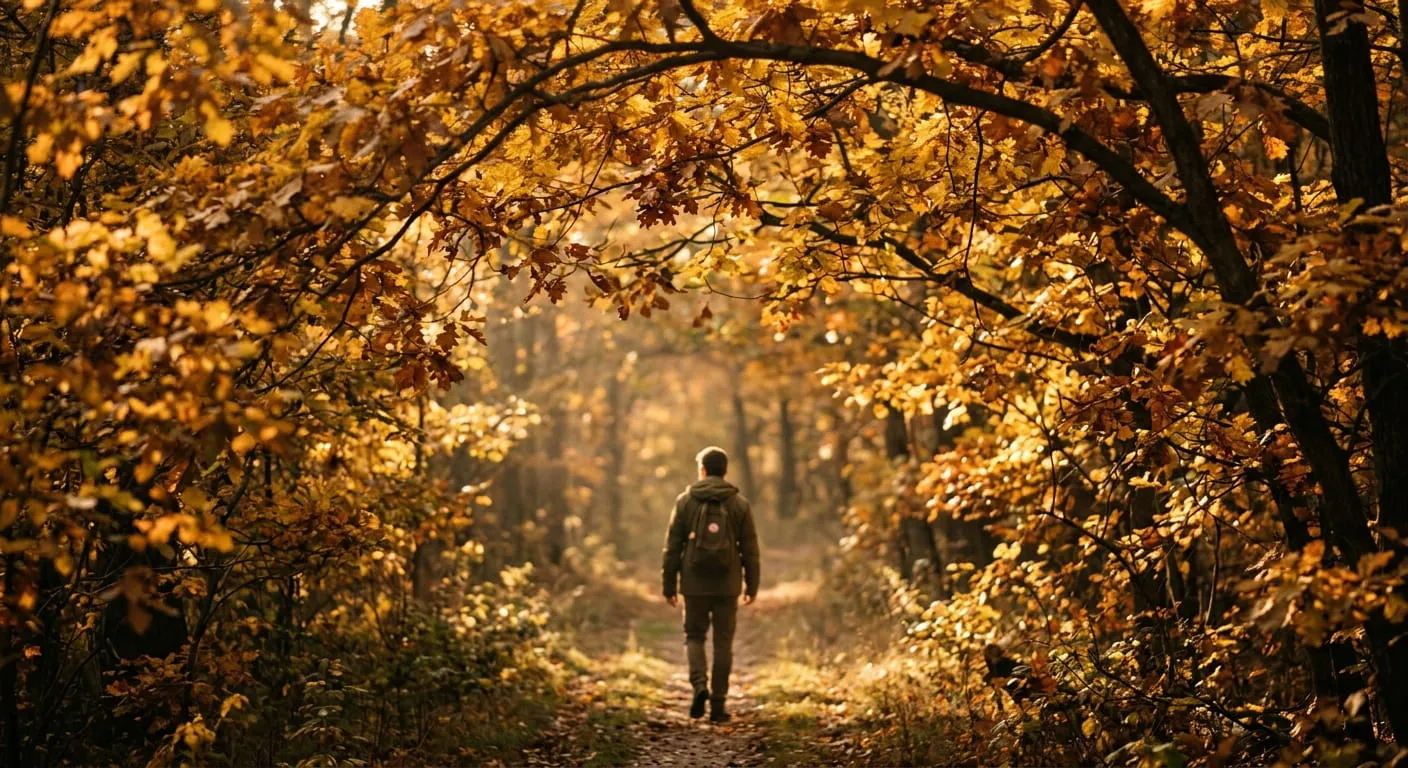
Natural framing photography uses elements found in the environment: tree branches forming an overhead canopy, a gap in dense foliage, a rock arch opening onto a landscape, or a cave mouth revealing a coastline. These frames feel organic and immersive because they belong to the scene rather than being imposed on it.
The best natural frames share a quality: they are visually interesting enough to contribute to the image without stealing attention from the subject. A canopy of autumn leaves framing a forest path adds warmth and context. A bare, tangled branch framing a portrait adds texture and mood.
Shooting tips:
- Look up. Overhanging branches and tree canopies are everywhere, but most photographers forget to use the space above the subject.
- Use a wide aperture (f/2.8 to f/4) to soften the frame elements while keeping the subject sharp. This separation makes the frame feel like a border, not a distraction.
- Position the subject where the frame opens up. The eye follows the path of least resistance, so place the subject where the natural frame creates a clear window.
- Get closer to the frame element. The closer you are to the branch or foliage, the softer and more abstract it becomes, creating a gentle vignette rather than a sharp border.
2. Architectural Frames

Architecture is full of ready-made frames: doorways, arches, windows, tunnels, corridors, and colonnades. These frames tend to produce clean, geometric compositions because the lines are straight and the shapes are deliberate. A stone archway framing a distant cathedral, a hotel window framing a city skyline, a tunnel opening onto a sunlit street: all of these use the built environment as a compositional tool.
Architectural frames are particularly effective in travel and street photography, where buildings provide an endless supply of framing opportunities. They also work well in portraits, where a doorway or window can add context and visual structure around the subject.
Shooting tips:
- Center your subject within symmetrical architectural frames (arches, doorways, tunnels) for a balanced, formal feel. The symmetry of the frame amplifies the symmetry of the composition.
- Use the depth of a tunnel or corridor to add perspective. A long passageway creates both a frame and a sense of distance, pulling the viewer’s eye toward the subject at the far end.
- Watch for light differences. Architectural frames often create strong exposure contrasts between the dark frame (interior wall, shadowed archway) and the bright subject (sunlit street, illuminated courtyard). Expose for the subject and let the frame go dark.
- Combine with golden hour light for warm, directional illumination that fills the frame opening while the surrounding structure stays in shadow.
3. Frame Within a Frame Photography

Frame within a frame photography takes the concept literally: the subject is enclosed by another frame that exists inside the image. Mirrors, picture frames hung on walls, television screens, phone screens, car windows, and even sunglasses all create this effect. The result is a layered composition where the viewer looks through one frame (the photograph itself) and then through a second frame (the element within the scene).
This technique works especially well for conceptual or storytelling images. A portrait reflected in a hand mirror, a street scene visible through a rain-spattered car window, or a landscape viewed through binoculars all add a narrative layer that a simple composition cannot. The second frame introduces a question (what is the photographer looking at, and why through this particular opening?) that keeps the viewer engaged longer than a direct shot would.
Architectural settings are especially rich for this technique. A medieval archway looking onto a modern street, a crumbling window frame revealing an overgrown courtyard, or a hotel corridor leading the eye through a sequence of nested doorways all use the built environment to create depth through repetition of frames.
Shooting tips:
- Focus on the subject inside the inner frame, not on the frame itself. If you are shooting a reflection in a mirror, focus on the reflected subject, not on the mirror’s surface.
- Clean, simple inner frames (a rectangular window, a round mirror) work better than busy or irregular ones. The inner frame should have a recognizable shape.
- Experiment with filling different proportions of the image. The inner frame can be small and centered, creating a “window” effect, or large and nearly edge-to-edge, creating a subtle border.
- Reflections count. Puddles, glass facades, and polished surfaces all create natural frame-within-a-frame opportunities, especially in urban environments after rain.
- Stack frames when possible. A window inside a doorway, or a picture frame on a wall seen through an open door, creates a third layer of depth. Each nested frame reduces the subject’s visible area but increases the sense of distance and story.
- For street photography, phone and car windows offer ready-made moving frames. Shoot from outside through a passenger window, or frame a street performer through a row of smartphones held up by a crowd.
4. Foreground Frames
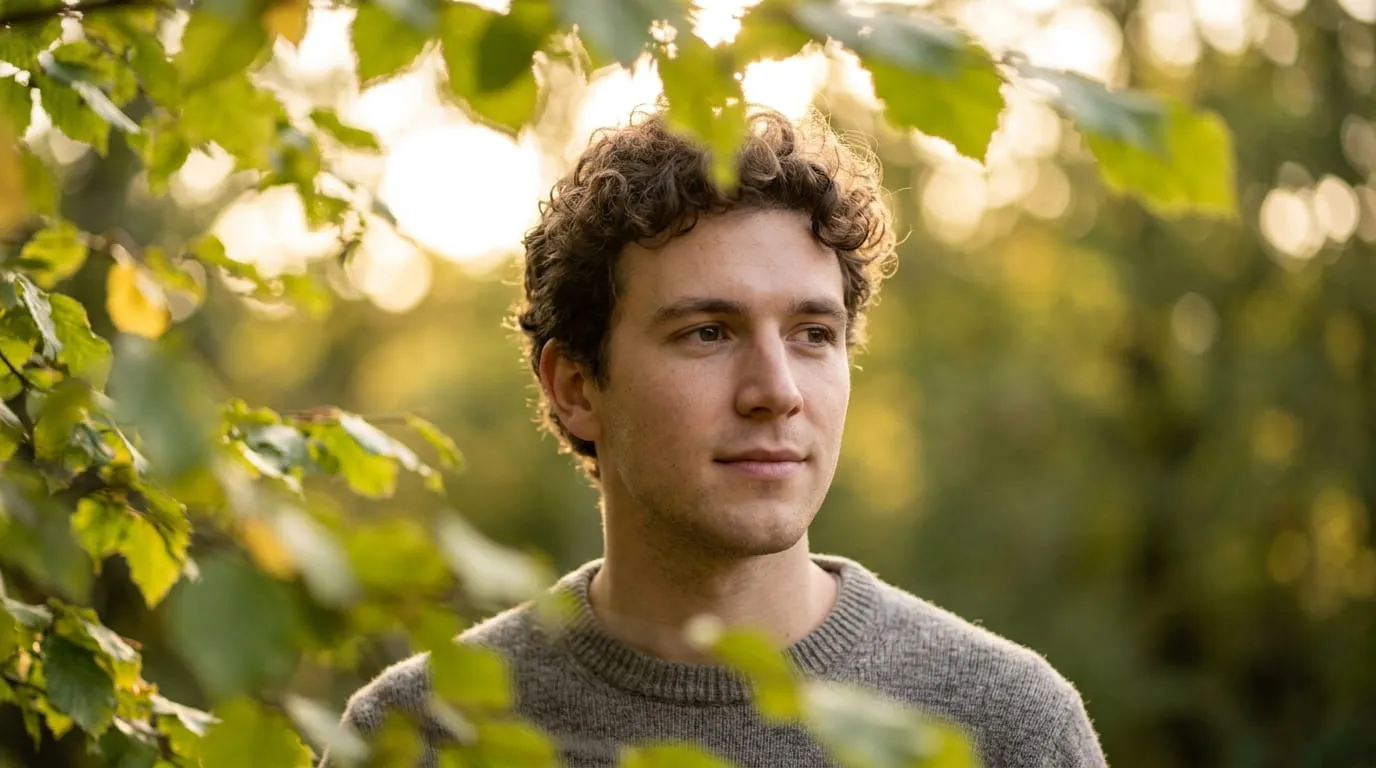
Foreground framing places objects between the camera and the subject, using them as a soft or partial frame. This is different from natural framing in that the frame elements are deliberately positioned in the foreground rather than being part of the surrounding environment. Out-of-focus leaves at the edges of the frame, a fence with the subject visible through a gap, flowers in the bottom of the frame with a portrait behind them: these all create foreground frames.
The main advantage is depth. By placing something between the lens and the subject, you create a clear sense of layers: foreground, subject, background. This three-dimensional quality is what separates a compelling image from a flat one.
Shooting tips:
- Use the widest aperture available to blur the foreground elements into soft, abstract shapes. At f/1.8 or f/2, a leaf or flower becomes a wash of color rather than a distracting detail.
- Hold a foreground element (a branch, a piece of fabric, even your hand with spread fingers) directly in front of the lens for a quick, improvisational frame. This works especially well for portraits.
- Keep the foreground frame to the edges. If the foreground element covers the subject’s face or the main point of interest, it stops being a frame and becomes an obstruction.
- Colored foreground elements (autumn leaves, wildflowers, neon signs) add a color wash that can complement or contrast with the subject.
5. Light and Shadow Frames
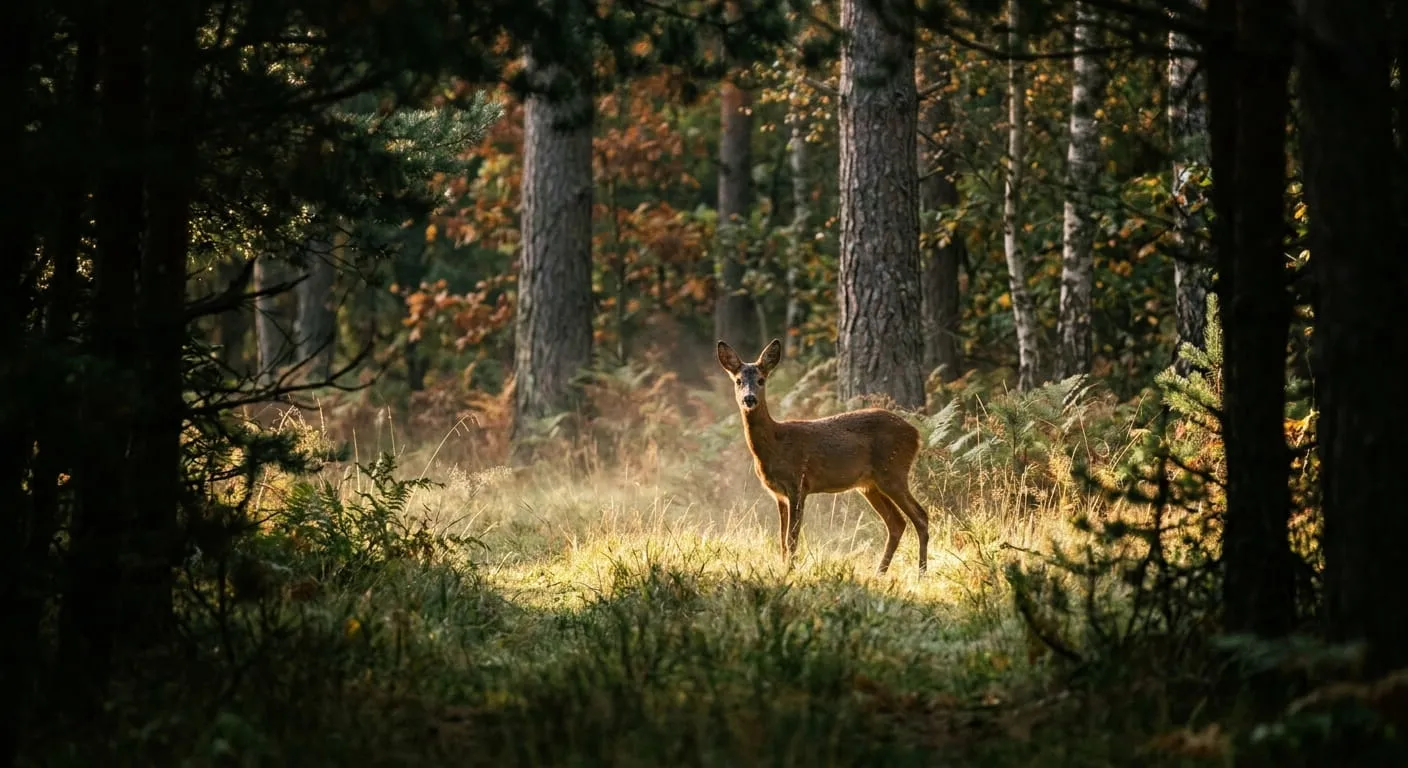
Light itself can be a frame. A shaft of sunlight falling through a window onto a subject, a spotlight isolating a performer on a dark stage, or the shadow of a tree creating a dark border around a sunlit clearing: all of these use light and shadow to define boundaries around the subject.
This type of framing is the most subtle and the hardest to control, because it depends on the light conditions being right. But when it works, the results are striking. The human eye is drawn to the brightest part of an image, so a subject lit by a pool of light within a darker surrounding area naturally commands attention without any physical frame at all.
Shooting tips:
- Look for shafts of light in interiors: windows, skylights, and open doors all cast directional light that creates natural pools of brightness. Position the subject inside that pool.
- Expose for the highlights. Let the shadows go dark to strengthen the framing effect. If you expose for the shadows, the bright area loses its punch and the frame disappears.
- Shadow patterns from fences, blinds, lattices, and tree canopies can create repeating frames across a scene. These work well in both portraits and street photography.
- Overcast days rarely produce light-and-shadow frames. This technique is strongest during golden hour or in environments with a single, directional light source.
Framing Techniques That Work Across All Types
Regardless of which type of frame you use, a few principles apply universally:
Depth of field controls separation. A wide aperture blurs the frame, making it less distracting and more atmospheric. A narrow aperture keeps both the frame and the subject sharp, which works when the frame itself adds important context (an ornate doorway, a flower species you want identifiable).
Darker frames are stronger. The eye moves from dark to light. A dark frame surrounding a bright subject creates a natural focal point. If the frame is brighter than the subject, the effect weakens or reverses entirely.
Partial frames work. Not every frame needs to surround the subject on all four sides. An overhanging branch across the top of the frame, a wall on one side, or a shadow along the bottom half is enough. Partial frames feel less staged and more natural than perfectly enclosed compositions.
The frame should complement the subject. A rough, weathered wooden frame works for a rustic portrait. A clean, geometric archway works for architectural subjects. A soft, blurred floral foreground works for intimate portraits. When the frame’s character matches the subject’s mood, the whole image feels cohesive.
Don’t let the frame overpower the subject. If viewers notice the frame before the subject, something is wrong. The frame is a supporting element. It should guide the eye, not demand it. Simplify or blur the frame if it competes.
Of all the framing techniques in photography, the most important one is simply awareness. Framing in photography composition is one of the most accessible techniques available. Unlike specialized gear or advanced post-processing, framing costs nothing and requires only awareness. The frames are already in the scene. The skill is learning to see them, and then positioning the camera so they do their job.
For more composition techniques beyond framing, see our guide to composition tips that go beyond the rule of thirds.