
Leading lines in photography are one of the most powerful tools in composition. By definition, a leading line is any visual element that guides the viewer’s eye through the frame toward a subject or point of interest. Used deliberately, they create depth, add direction, and make photos feel immersive. Used carelessly, they pull the eye out of the frame entirely.
The good news is that leading lines are everywhere. You don’t need a special subject or an unusual location to work with them. Roads, shadows, fences, rivers, and even the direction of a person’s gaze all create lines you can use. The skill is learning to see them before you raise the camera.
There are five distinct types of leading lines in photography, each producing a different visual effect, with examples and shooting tips for each:
| Type | Common examples | Visual effect |
|---|---|---|
| Straight | Roads, railways, fences | Direction, depth, focus |
| Diagonal | Stairs, escalators, rooftop edges | Energy, tension, movement |
| Converging | Train tracks, corridors, tree avenues | Perspective, distance, drama |
| Curved | Rivers, paths, coastlines, S-curves | Flow, elegance, journey |
| Implied | Gaze direction, rows of objects | Narrative, intrigue, subtlety |
1. Straight Lines
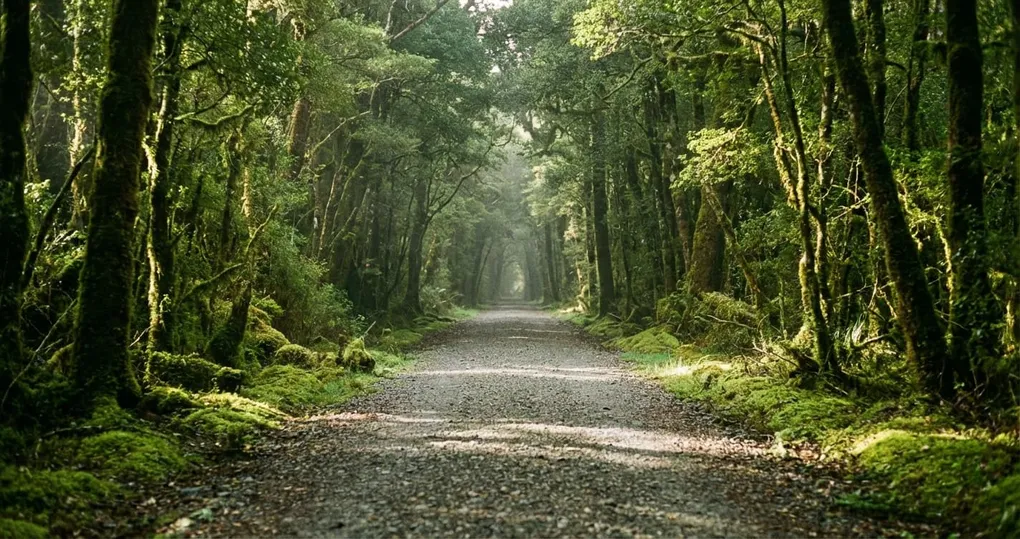
Straight lines are the most common and easiest to spot: a road stretching ahead, a fence running alongside a field, a corridor receding into a building. They create a direct visual path from the foreground into the frame.
The key is to give them somewhere to go. A line that enters from the lower edge and terminates at your main subject is doing its job. A line that wanders off the side of the frame is pulling the viewer out of the image.
Shooting tips:
- Get lower. A low camera angle exaggerates the length of straight lines and makes them appear to extend further into the scene.
- Center straight lines for powerful symmetrical compositions, or offset them slightly to place your subject at the line’s natural endpoint.
- Use a wide-angle lens to amplify the apparent depth of lines receding into the distance.

2. Diagonal Lines
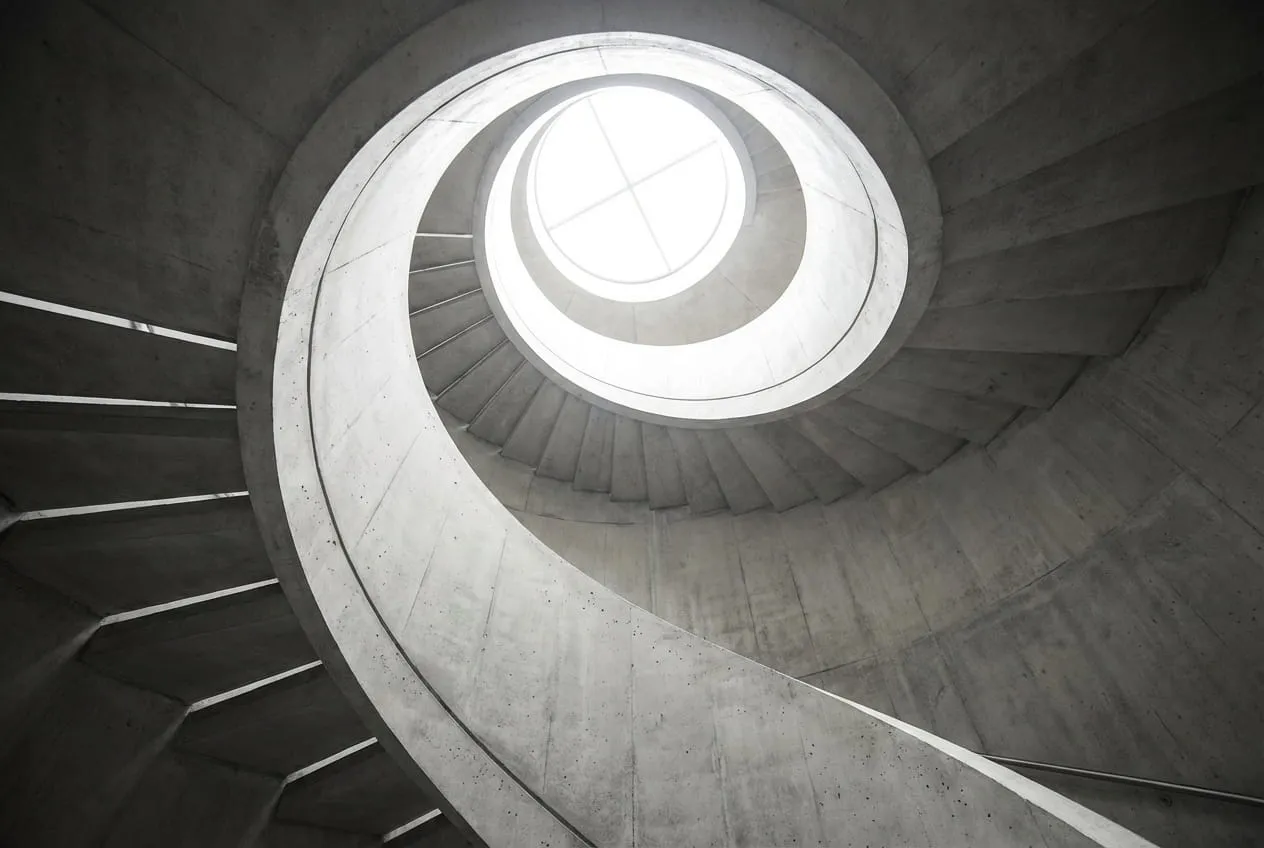
Diagonal lines in photography cross the frame at an angle rather than running parallel to the edges. Where horizontal and vertical lines feel stable and static, diagonal lines introduce movement, tension, and visual energy. A staircase shooting up from the lower corner, an escalator cutting across the frame, rooftop edges slanting against the sky: all of these add dynamism that a horizontal composition cannot replicate.
When a subject moves along a diagonal line, the image feels mid-action rather than a still snapshot, something straight or horizontal compositions rarely achieve.
Shooting tips:
- Look for diagonal shadows during low morning or evening light. Shadows cast by fences, lamp posts, and architecture create strong diagonal lines at no extra effort.
- A diagonal line that runs from corner to corner has the most visual impact. Partial diagonals still work but carry less force.
- Avoid tilting the camera just to manufacture a diagonal (Dutch angle) unless there is a creative reason: it can feel contrived.
3. Converging Lines
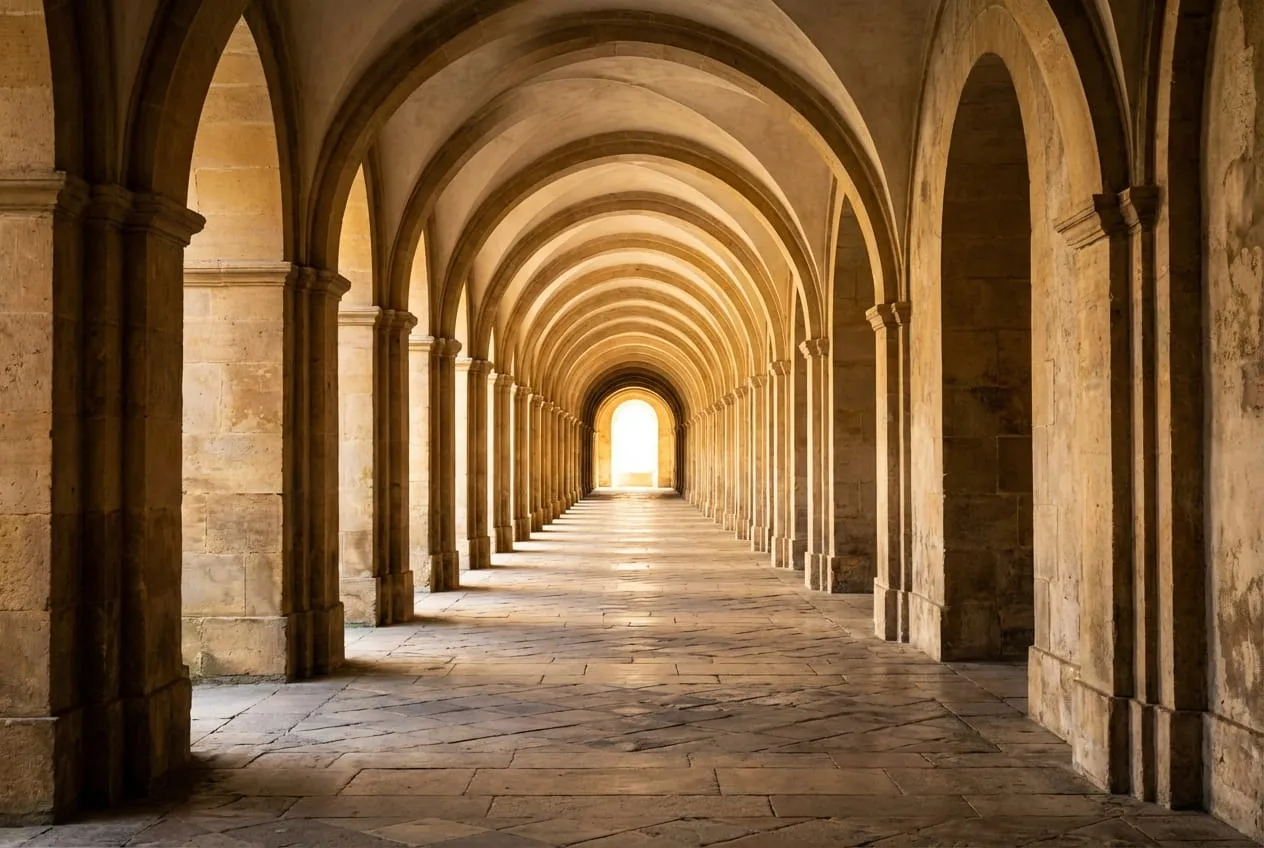
In converging lines photography, two or more parallel lines appear to meet at a single point in the distance, known as the vanishing point. This is a perspective effect: parallel structures that recede from the camera appear to get closer together until they merge on the horizon.
Railroad tracks are the classic example, but converging lines appear anywhere that parallel structures extend into the distance: hallways with repeating columns, tree-lined avenues, the two edges of a long bridge. The more dramatic the perspective, the stronger the convergence, and the greater the sense of depth and distance.
Converging lines are especially powerful for communicating scale. When the lines appear to merge far in the background, the viewer intuitively understands that the scene extends well beyond the frame.
Shooting tips:
- Get close to the lines and low to the ground to maximize the effect. The closer the camera to the lines, the steeper the perspective angle and the more dramatic the convergence.
- Position the vanishing point where you want the viewer’s attention, often where your main subject stands.
- A wide-angle lens exaggerates convergence. A telephoto lens compresses it. Choose based on how dramatic you want the depth to appear.
4. Curved Lines
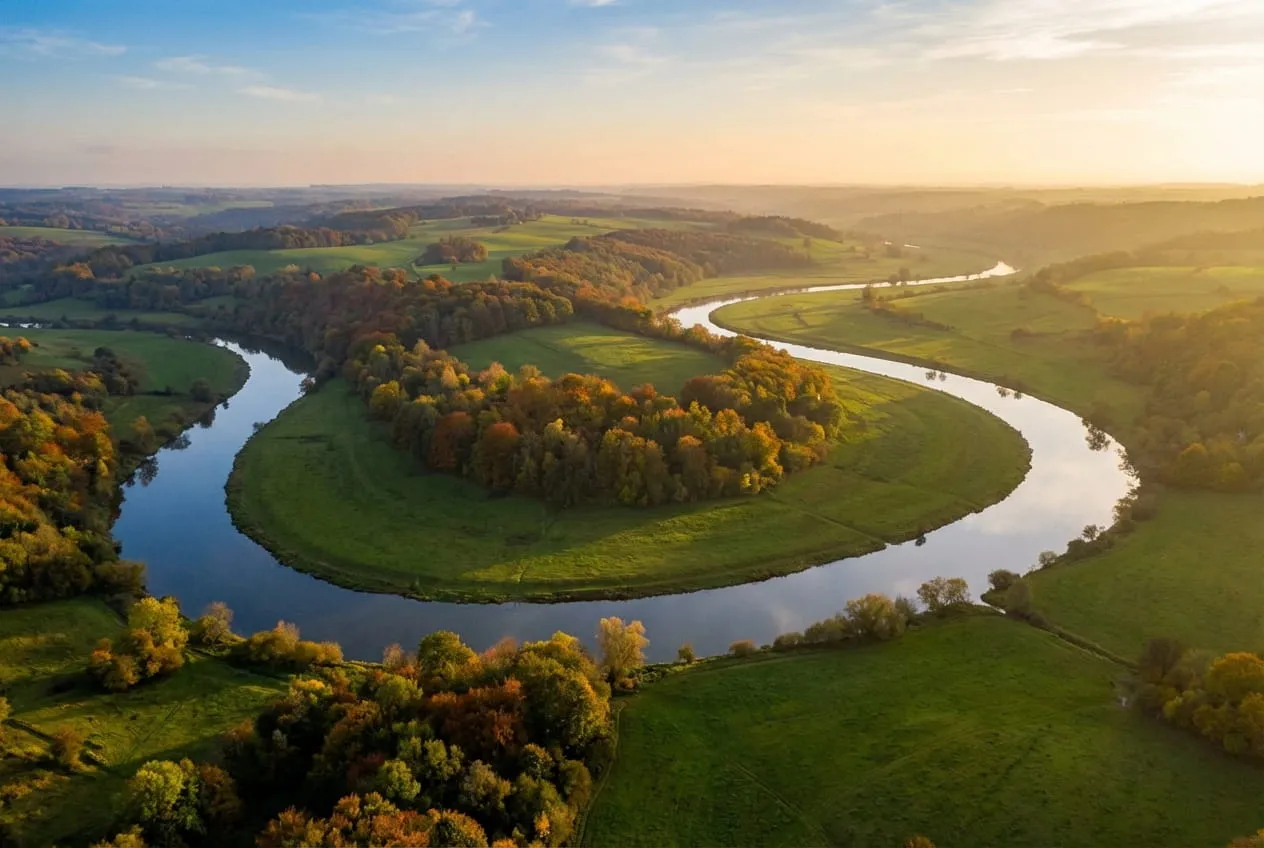
Curved lines trade the directness of straight lines for grace and flow. A river winding through a valley, a path curling through a forest, a coastline arcing to the horizon: these all draw the viewer’s eye through the scene in a slower, more exploratory way. The result feels organic rather than constructed.
The S-curve is the most sought-after variant in landscape photography. When a river, road, or path forms an S-shape through the frame, it creates two bends that keep the eye moving continuously without ever leaving the image. Many photographers will scout a location specifically to find the angle that reveals an S-curve.
Shooting tips:
- Elevated viewpoints reveal S-curves that are invisible from ground level. A hill, a drone, or even a raised platform can transform a meandering path into a sweeping curve.
- Enter the curve from a lower corner of the frame to give the viewer a clear starting point and a natural direction of travel.
- Curved lines work especially well in soft, diffused light. Harsh shadows running alongside a curved subject create visual clutter that competes with the line.
5. Implied Lines
Implied lines are not physical structures in the scene. They are created by the arrangement of separate elements or by the direction of a subject’s gaze. The viewer’s brain draws the connection automatically, even though nothing physically connects the points.
A row of identical objects (lamp posts, fence posts, stones) creates an implied line through their spacing and alignment. A person looking to one side creates an implied line in the direction of their gaze: the viewer’s eye follows that invisible path to see what the subject is looking at. A flock of birds in mid-flight creates an implied line through the sweep of their trajectory.
Implied lines are more subtle than physical ones and often produce more sophisticated compositions. They require the viewer to participate in completing the image.
Shooting tips:
- When photographing people or animals, pay attention to eye direction. A subject looking into the frame creates a comfortable implied line with space ahead of them. A subject looking out of the frame creates tension, which can be used intentionally but can also feel uncomfortable.
- Combine an implied line with a physical leading line for layered compositions: a road leading the eye to a figure who is gazing deeper into the scene creates two reinforcing directions at once.
- Repeated elements at regular intervals form the strongest implied lines. Irregular spacing weakens the effect significantly.

Finding Leading Lines in the Field
Knowing the five types is one thing. Building strong leading lines composition in the field requires training your eye to spot them before raising the camera, and that skill develops with practice.
Slow down and scout. Lines that are invisible at eye level often become obvious from a low crouch or an elevated position. Walk around the scene before committing to a composition. What looks like a cluttered foreground from standing height can reveal a clean converging line from the ground.
Consider where the line ends. A leading line without a destination is just a line. Before using it, ask: where does this take the viewer? If the answer is a strong subject, use it. If the answer is “the edge of the frame,” reposition until you find an angle where the line arrives somewhere meaningful.
Watch for lines that work against you. Telephone wires cutting across the sky, a fence running out of frame behind your subject, a strong shadow pointing away from the scene: these are competing lines that dilute your intended composition. Adjust your position to remove them, or incorporate them deliberately if they add to the image.
Use lines to solve isolation problems. A subject that feels disconnected from the scene often benefits from a leading line that ties the foreground to it. Lines are structural tools for building coherent compositions, not just decorative additions.
For a broader introduction to composition, this guide on composition techniques beyond the rule of thirds covers several complementary methods that pair well with leading lines. If you want to go deeper on a single technique, framing in photography is the natural companion: where leading lines guide the eye along a path, framing encloses the subject entirely.
Frequently Asked Questions
What are leading lines in photography?
Leading lines are compositional elements, physical or implied, that guide the viewer’s eye through a photograph. They can be roads, railways, fences, rivers, corridors, shadows, or even the direction of a subject’s gaze. Effective leading lines give the viewer a natural path to follow and connect the foreground to the subject.
What are the types of leading lines in photography?
The five main types are: straight lines (roads, fences, railways), diagonal lines (stairs, rooftops, shadows), converging lines (parallel structures meeting at a vanishing point), curved lines (rivers, paths, S-curves), and implied lines (gaze direction, rows of objects). Each produces a distinct visual effect and suits different subjects and scenes.
Do leading lines always have to lead to a subject?
Ideally, yes. A leading line that guides the eye to a strong focal point is more satisfying than one that disappears off the edge of the frame. That said, some compositions deliberately let a line exit the frame to suggest scale and continuation, such as an infinite road or coastline stretching beyond the image.
What makes a leading line strong or weak?
A strong leading line enters the frame from a clear edge, usually the bottom or a corner, and travels toward something meaningful: a subject, a vanishing point, or at minimum a satisfying place to rest. Weak leading lines exit the frame without arriving anywhere, compete with several other strong lines in the same image, or run parallel to the edges rather than cutting through the scene with direction and purpose.
Can leading lines be used in portrait photography?
Yes. In portrait photography, implied lines are especially useful. A subject’s gaze, the angle of their body, or the direction they are pointing all create implied leading lines. Physical lines such as a railing, staircase, or pathway can also frame a portrait and add depth and context to the scene.