That bright, clean look in commercial portraits and beauty photography — white background, luminous skin, almost no shadows — comes from a technique called high key lighting. It looks simple from the outside, but most photographers who try it for the first time end up with clipped highlights and washed-out skin rather than the polished result they were going for.
The reason is a common misconception: high key lighting photography is about controlling the ratio between your light sources, not just turning up the total brightness. That distinction is what separates a clean, luminous high key portrait from a photo that just looks overexposed.
What High Key Lighting Actually Means
High key refers to the lighting ratio. In any portrait setup, the key light (the dominant source) and the fill light (which softens shadows) have a power relationship. That ratio determines how dramatic the shadows appear.
In low key work, the ratio is steep: one bright source, deep shadows, high contrast. In high key photography, the ratio is flat: key and fill are close in intensity, and shadow areas are nearly eliminated. The result is a bright, open look rather than a sculpted, moody one.
The histogram confirms whether you have reached high key territory. Most tones should sit in the upper third, with the white background reading at pure white (255). The subject’s skin should be bright but not clipped: luminous highlights with detail still visible, not blown-out patches.
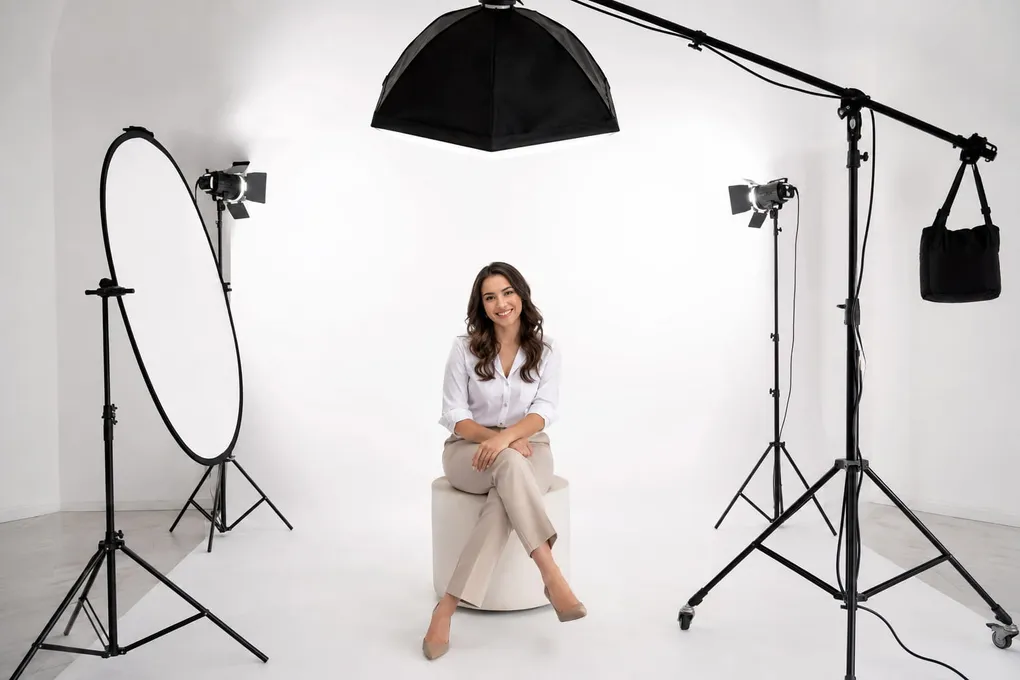
High Key Lighting Setup: Studio
A three-source setup is the standard starting point for studio high key work.
The Lights
Key light: A large softbox at least 36 inches wide, positioned directly in front of and slightly above the subject. A butterfly lighting position works well because it distributes light evenly across both cheeks with minimal side shadow. Budget options from Godox (the 90cm octabox, around $50-80) work well for this. The Profoto RFi 2x3’ softbox (~$280-330) is the professional step up.
Fill light: A second strobe or a large silver reflector opposite the key, set to roughly the same power. A 43” 5-in-1 reflector ($20-30) works as a low-budget substitute for a second strobe. The fill eliminates the shadows the key creates.
Background lights: One or two strobes aimed directly at the background. Without these, even a white seamless backdrop photographs as mid-gray. The background needs its own dedicated light source to go pure white in camera.
Setup Steps
- Set up the background lights first. Shoot the empty backdrop and adjust power until the histogram shows pure white at the far right edge. Note that power setting.
- Add the key light in front of the subject, slightly above eye level. Take a test frame and review skin tone in the histogram.
- Add the fill light or reflector opposite the key. Look for shadows under the nose, chin, and eye sockets. Bring fill power up until those shadows become faint rather than absent.
- Expose the subject 0.7 to 1 stop brighter than a neutral meter reading. Meter for luminous skin, not a technically “correct” mid-tone reading.
Camera Settings
| Setting | Recommendation |
|---|---|
| ISO | 100–200 |
| Aperture | f/5.6–f/11 (even sharpness across the face) |
| Shutter speed | 1/125–1/200 (flash sync speed) |
| White balance | Flash preset |
| Metering | Spot meter on subject’s skin |
| Exposure | +0.7 to +1 stop from neutral |
The intentional overexposure is part of the technique. Metering for neutral against a white background makes the subject look dark by comparison. Expose for the skin.
Natural Light High Key
Studio strobes are not required. A large window on an overcast day provides the diffused, even light high key photography needs, with less control over the background.
Position the subject close to a large north-facing window (consistent, indirect light throughout the day). White walls on the sides and behind bounce light back, acting as natural fill. Place a white foam board or a 43” white reflector directly opposite the window at chest height to fill in shadows under the chin.
Set exposure compensation to +0.7 or +1. Evaluative metering will try to render the bright scene as neutral gray. Push it brighter intentionally.
The limitation is background control. A white wall lit by window light reads as light gray unless it sits close to the subject and receives direct window light. For a natural-light high key portrait with a true white background, shoot outdoors on a bright overcast day with a large white foam board held close behind the subject.
High Key vs Low Key: When to Use Each
| High Key | Low Key | |
|---|---|---|
| Shadows | Minimal to none | Deep, dominant |
| Mood | Clean, approachable, optimistic | Dramatic, intense, moody |
| Common uses | Commercial, beauty, newborns, product | Editorial, fine art, dramatic portraits |
| Lighting ratio | 1:1 to 2:1 | 4:1 or higher |
| Background | White or near-white | Dark |
High key suits subjects where clarity and warmth matter: brand headshots, beauty campaigns, newborn sessions, product photography. Low key suits subjects where shadow carries the mood, like Rembrandt lighting portraits. Choose based on what the image needs to communicate, not a default habit.
Common Mistakes
Clipping the subject while chasing a white background. Raising all lights to maximum power clips skin tones along with the background. Meter each separately. Background lights control backdrop brightness; key and fill control the subject.
Eliminating every shadow. A high key portrait with zero shadow looks flat and two-dimensional. Keep subtle shadows under the nose and chin to preserve facial structure. A faint nose shadow defines the face; its complete absence flattens it.
Underlit background. A white seamless without dedicated background lights photographs as light gray. This is the most common reason high key setups look muddy rather than clean. Background lights are not optional for studio work.
Auto white balance with strobes. Flash sits around 5500K, but Auto WB sometimes makes unwanted adjustments that shift skin tones toward blue or orange. Set white balance to Flash preset. The guide on white balance techniques covers the adjustment process in detail.
Try It in One Session
Start with one strobe and a 36” softbox aimed at a white wall from about four feet away. Shoot the wall alone and confirm it reads as pure white. Then position a subject in front and add a fill reflector on the opposite side.
That minimal setup teaches the fundamentals: how fill intensity affects shadow depth, how overexposing skin by half a stop shifts the feel from correct to luminous, and how background distance creates a gradient from white to gray. Once those relationships are intuitive, adding more lights becomes about refining control rather than fixing problems.